Deploying a production-ready Kubernetes cluster on AWS EKS used to be a time-consuming process that required deep expertise in cloud infrastructure. But what if you could spin up a fully configured cluster in just 10 (ish) minutes? With the right tools and AI assistance, it's becoming possible.
The Power of AI-Assisted Infrastructure
Whether you're using an LLM like ChatGPT or an AI-powered IDE like Cursor, you can start with a simple prompt to generate the basic infrastructure code you need. Here's an example prompt that works with both approaches:
Example Infrastructure Prompt
Create Terraform code to provision an EKS cluster in AWS with a VPC, worker nodes, and outputs for kubeconfig access. Make it environment-agnostic with variables for region, cluster name, and node count. Also need Helm chart deployments after cluster is up.This prompt will generate the basic structure for a development-ready EKS cluster. You can modify it based on your specific needs, such as adding custom node groups, working inside an existing VPC, setting up specific Helm charts, or configuring additional AWS services.
Three Paths to Kubernetes on AWS
When it comes to deploying Kubernetes on AWS, you have three powerful options that can dramatically reduce setup time and complexity. Each approach has its strengths, and the best choice depends on your team's expertise, time constraints, and long-term infrastructure goals.
1. AI-Powered Infrastructure (ChatGPT)
Using an LLM like ChatGPT to generate Terraform code offers a quick start with minimal upfront knowledge. You can use the prompt above as a starting point and iterate based on the generated code.
Best for: Quick prototypes, learning, or researching different options for configuration.
2. IDE-Assisted Development (Cursor)
Cursor's AI capabilities can help you write and validate Terraform code directly in your IDE. Use the same prompt as a foundation, but with the added benefit of real-time feedback and code completion.
Best for: Platform Engineering pros that want to maintain full control over their infrastructure code while leveraging AI assistance for faster development.
3. Agentic Platform (StarOps)
StarOps provides an end-to-end Kubernetes deployment and management platform that handles the entire infrastructure lifecycle, from cluster provisioning to day-2 operations, with built-in best practices and security controls. The prompt isn't even necessary, just click on what you need, including the most common/useful components. Review and ask StarOps to execute when ready.
Best for: Teams that want to focus on applications rather than infrastructure, need production-grade reliability, and value built-in security and compliance features.
Comparing the Approaches
| Feature | ChatGPT | Cursor | StarOps |
|---|---|---|---|
| Setup Time | 15-infinity minutes | 20-60 minutes | 5-10 minutes |
| Infrastructure Control | Full control | Full control | Full control |
| Learning Curve | High | Moderate | Low |
| Maintenance | Self-managed | Self-managed | AI Assistance |
| Best For | Learning & prototyping | Custom infrastructure | Production workloads |
In the following sections, we'll walk through each approach in detail, starting with the prerequisites and then diving into the specific steps for your chosen method. Whether you're looking to learn, build custom infrastructure, or deploy a production-ready platform, we've got you covered.
Prerequisites
Before we dive into any of the three approaches, you'll need to have these essential tools installed and configured. These are the building blocks that will enable you to interact with AWS, manage infrastructure as code, and control your Kubernetes cluster.
AWS CLI
The AWS Command Line Interface is your gateway to AWS services. It's essential for authentication, managing AWS resources, and configuring your local environment.
After installation: Run aws configure to set up your AWS credentials and default region.
Terraform
Terraform is the infrastructure as code tool that will help you define and manage your AWS resources in a declarative way. It's crucial for both the ChatGPT and Cursor approaches.
After installation: Verify with terraform version to ensure it's properly installed.
kubectl
The Kubernetes command-line tool is your interface to your EKS cluster. You'll use it to deploy applications, manage cluster resources, and view logs.
After installation: Test with kubectl version to confirm it's ready to use.
Quick Verification
After installing all tools, run these commands to verify your setup:
aws --versionterraform versionkubectl version --clientNote: If you're using StarOps, you only need the AWS CLI and kubectl installed. Terraform is optional as the platform handles infrastructure management for you.
ChatGPT Walkthrough: From Prompt to Development Environments
Let's walk through how to use ChatGPT to generate and deploy a Kubernetes cluster on AWS. This approach is perfect for learning and prototyping, as it gives you full control over your infrastructure while leveraging AI to handle the boilerplate code. Please do not try this in production!
Step 1: Prompt the LLM
Start by using the prompt we discussed earlier in the Example Infrastructure Prompt section. ChatGPT will generate a set of Terraform files that define your infrastructure. The response will include multiple files that work together to create your EKS cluster.
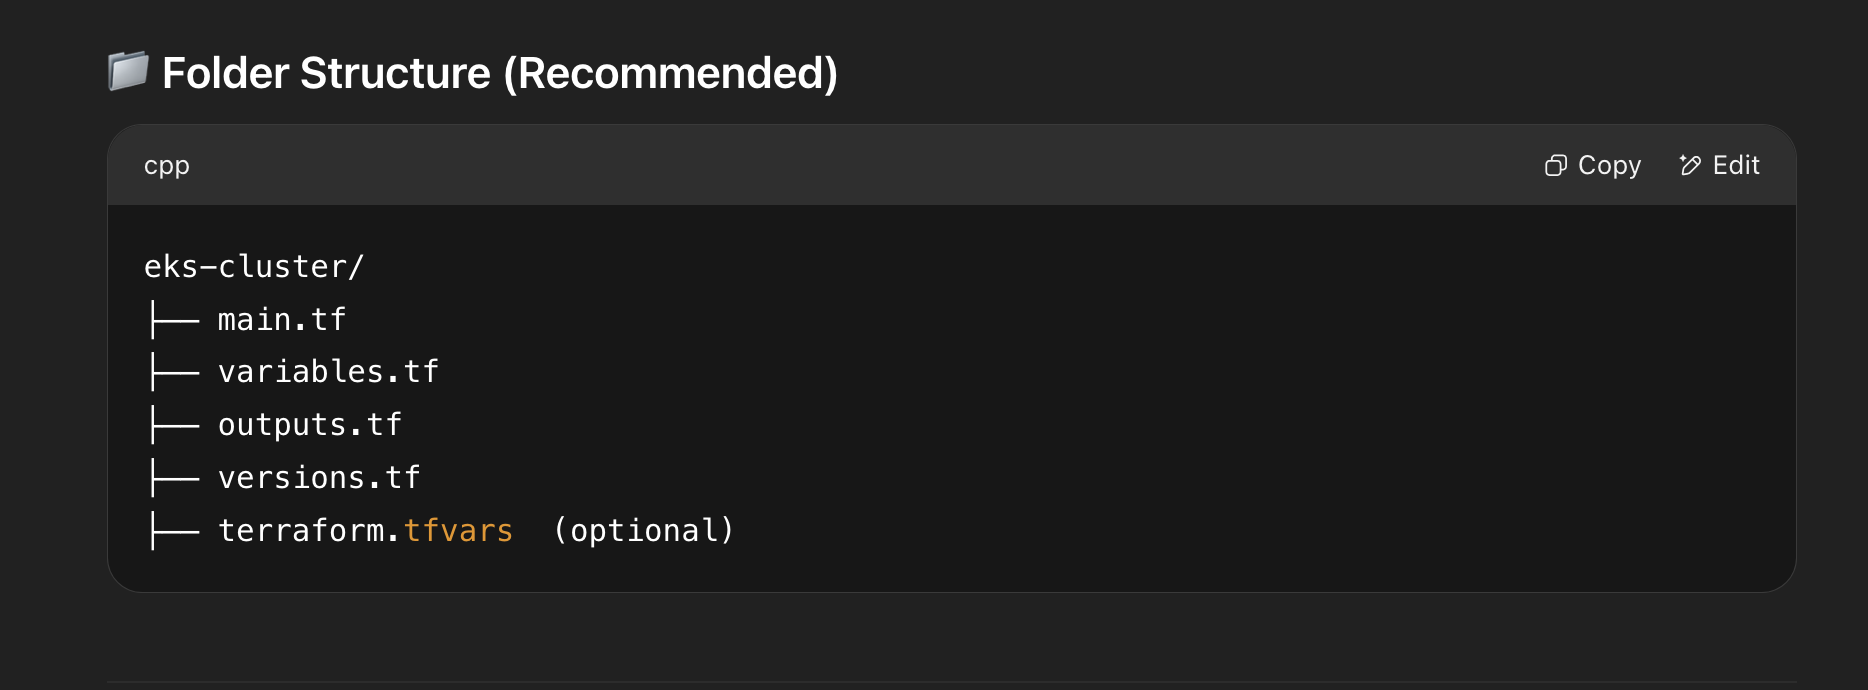
Generated Terraform Structure
The AI will generate these key files:
main.tf- Orchestrates the modulesvariables.tf- Defines input parametersoutputs.tf- Exports cluster informationeks.tf- EKS cluster configurationvpc.tf- Network infrastructure (optional)
module "eks" {
  source = "terraform-aws-modules/eks/aws"
  cluster_name = var.cluster_name
  cluster_version = "1.29"
  subnets = module.vpc.private_subnets
  // ... additional configuration ...
}
Generated Assets Preview
The generated code will include some of the necessary resources for a non-production EKS cluster, including basic VPC configuration, security groups, and IAM roles. Review the code carefully before proceeding to deployment.
Step 2: Review and Save the Terraform Modules
After receiving the generated code from ChatGPT, you'll need to:
- Review each file for accuracy and completeness
- Save the files in a new directory for your project
- Verify that all required variables are defined
- Check that the module versions are current
Step 3: Apply to an Environment
Create environment-specific variable files to manage different deployments. For example:
Environment Configuration
# dev.tfvars
region = "us-west-2"
cluster_name = "dev-cluster"
node_count = 2
Create similar files for other environments (e.g., staging.tfvars,prod.tfvars) with appropriate values.
Deployment Commands
# Initialize Terraform and download modules
terraform init
# Validate the configuration syntax and structure
terraform validate# Apply the configuration with environment variables
terraform apply -var-file="dev.tfvars"Always run terraform validate before applying changes. This command checks your configuration files for syntax errors and verifies that all required arguments are specified. It's a quick way to catch common mistakes before they reach your infrastructure.
The deployment process typically takes 15-20 minutes. Monitor the progress in the terminal and check the AWS Console for real-time status updates.
After the deployment completes, you'll have a functional EKS cluster. Depending on your prompt success, it may even support Helm charts to help you start an application deployment. This may have taken way more than 10 minutes. Sorry! Remember to run terraform destroy -var-file="dev.tfvars" when you're done to avoid unnecessary AWS charges for resources you no longer need.
Cursor Walkthrough: AI-Powered IDE Development
While ChatGPT provides a great starting point, using Cursor's AI capabilities directly in your IDE offers a more integrated development experience. You'll get real-time assistance, code completion, and immediate feedback as you build your infrastructure.
Step 1: Start with the Same Prompt
Begin with the same Example Infrastructure Prompt we used earlier. The key difference is that Cursor will help you implement the changes directly in your project, making it easier to iterate and refine the configuration.
Project Structure in Cursor
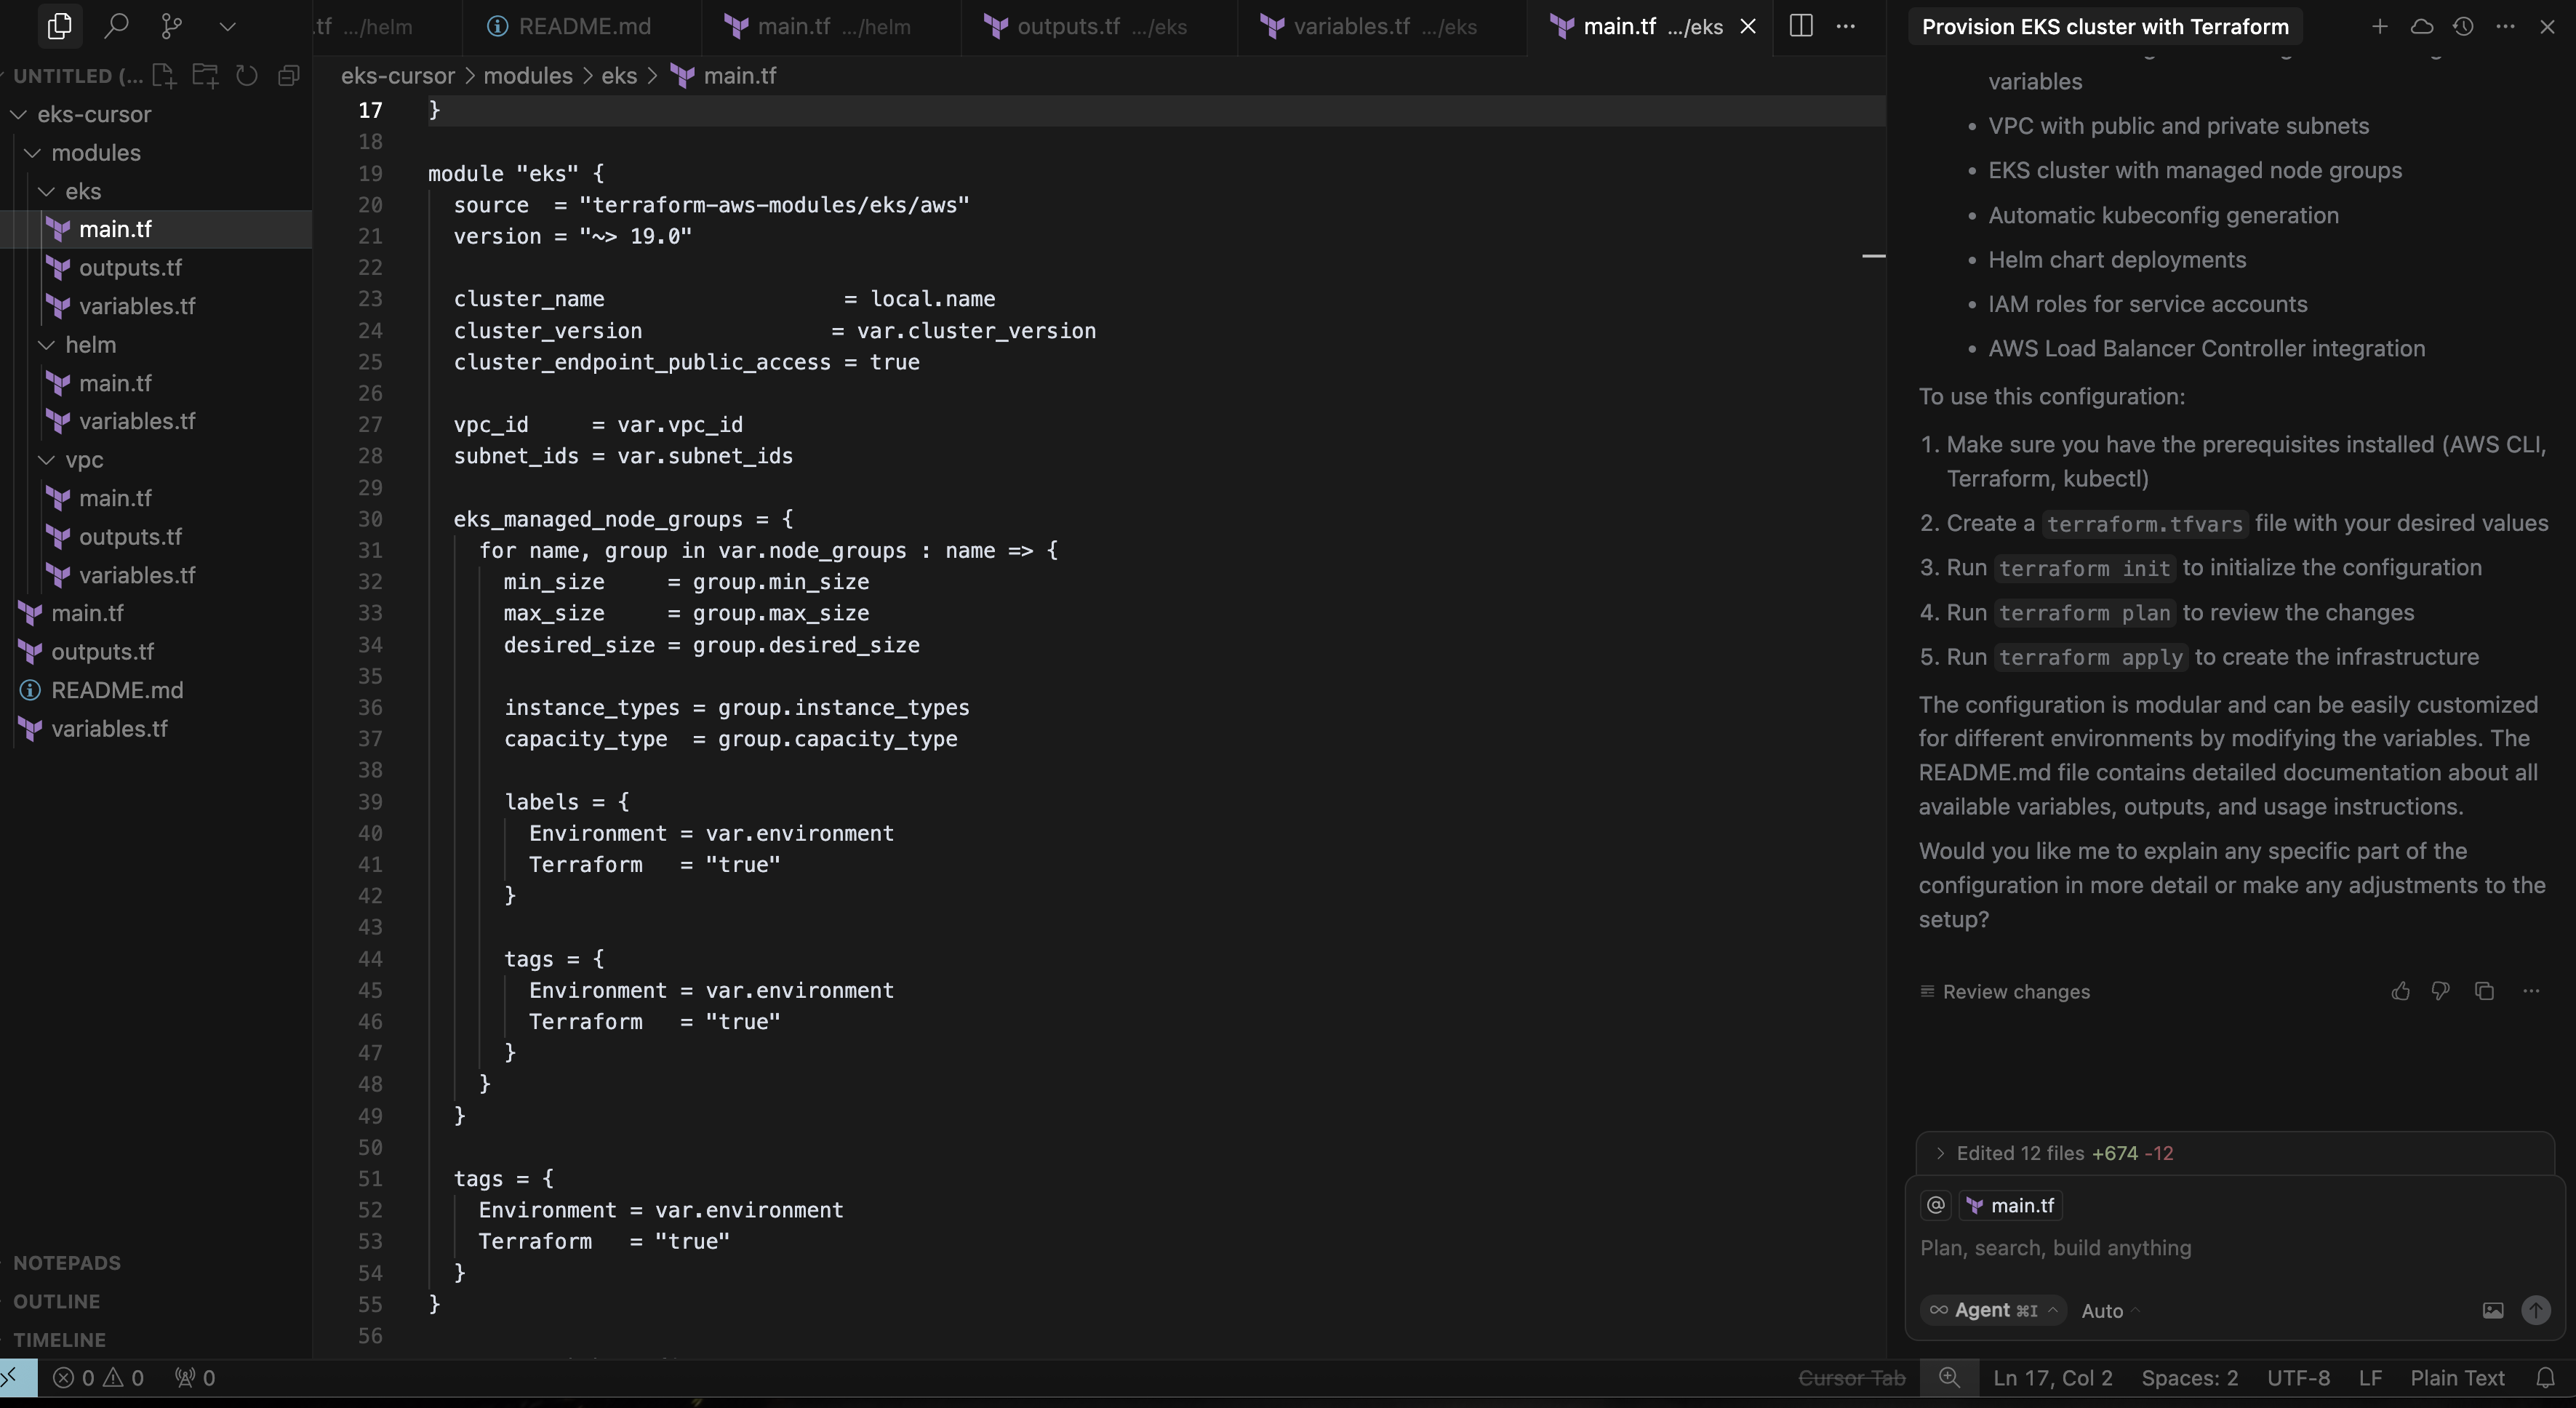
Cursor will help you create and organize the Terraform files in a proper project structure. The AI assistant can suggest file organization, module separation, and best practices as you go.
Step 2: Interactive Development
With Cursor, you can:
- Ask the AI to explain any part of the generated code
- Request modifications to specific resources
- Get suggestions for security improvements
- Validate your configuration in real-time
Example Cursor Interactions
# Ask Cursor to explain a resource
"Explain the EKS cluster configuration in eks.tf"
# Request a modification
"Add a node group with GPU instances"# Get security recommendations
"Review the security groups for best practices"Cursor's AI can help you understand and modify the infrastructure code as you develop, making it easier to learn and implement best practices.
Step 3: Validation and Deployment
The deployment process remains the same as with the ChatGPT approach, but Cursor provides additional benefits:
- Integrated terminal for running Terraform commands
- Syntax highlighting and error detection
- Quick access to documentation
- Version control integration
Deployment Workflow
# Use Cursor's integrated terminal
terraform init
terraform validate
terraform apply -var-file="dev.tfvars"
Cursor's integrated development environment makes it easier to manage the entire infrastructure lifecycle, from code generation to deployment and cleanup.
The Cursor approach offers a more interactive and educational experience, especially for developers who want to understand the infrastructure code while they build it. While it might take a bit longer than the ChatGPT approach, you'll gain more knowledge and have better control over your infrastructure. Unfortunately, this also means that you have to know what to ask for. Cursor and LLM's are great for the folks who already know what they want and need, and can be hyper-specific about requirements. If you are not in that category, you will definitely spend more time researching the unknowns.
StarOps Walkthrough: The 10-Minute Solution
If you're looking for the fastest way to get a production-ready Kubernetes cluster without dealing with infrastructure code, StarOps is your answer. This platform combines AI-powered automation with built-in best practices, integrated into your existing environment to deliver a fully configured cluster in minutes, not hours.
Step 1: Integrate Your AWS Account (5 minutes)
Start by connecting your AWS account to StarOps. The platform will create the necessary IAM roles and permissions via CloudFormation with your approval.
AWS Integration
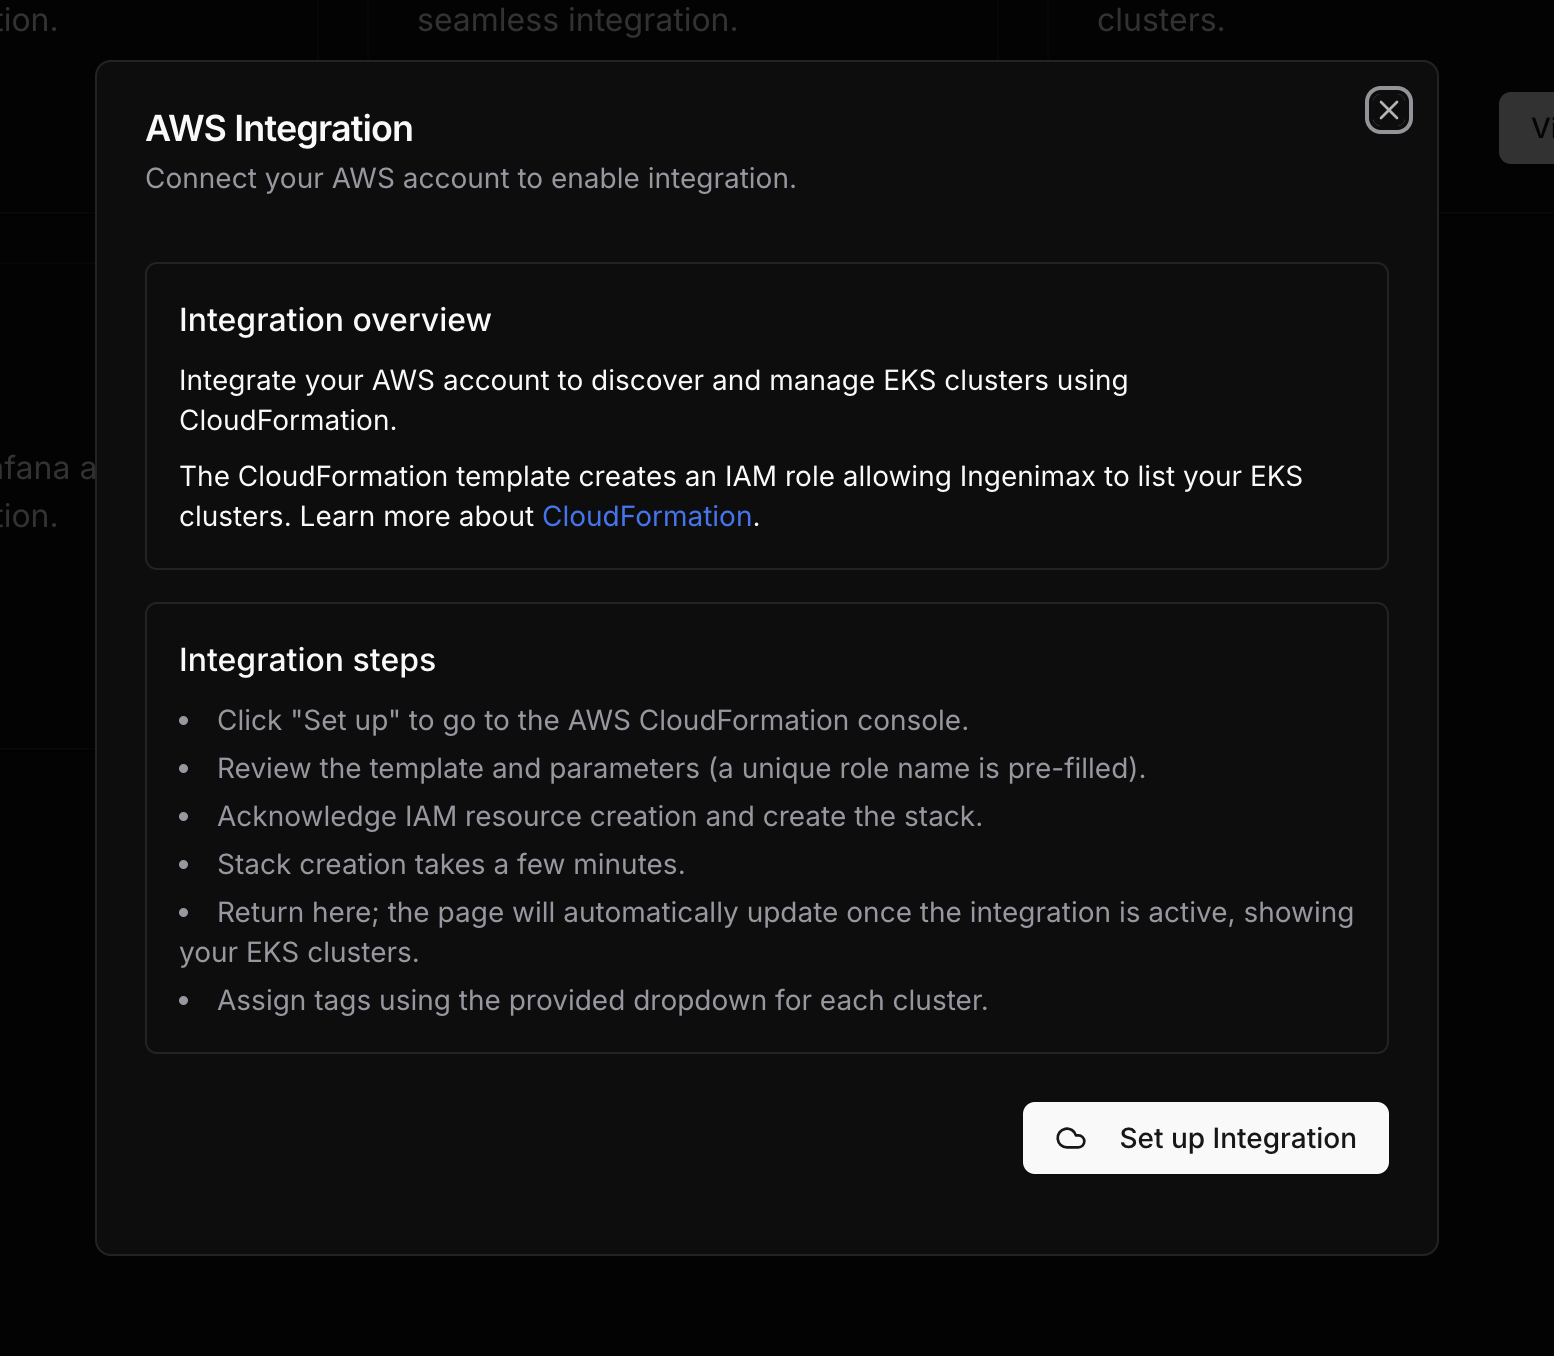
The integration process is fully automated and follows AWS security best practices. You'll get a clear summary of the permissions being granted before proceeding.
Step 2: Select Your Components
Choose 'EKS' from the available workflows, then customize your cluster with the defaults and additional components you need. StarOps includes pre-configured options for common Kubernetes add-ons and tools.
Component Selection
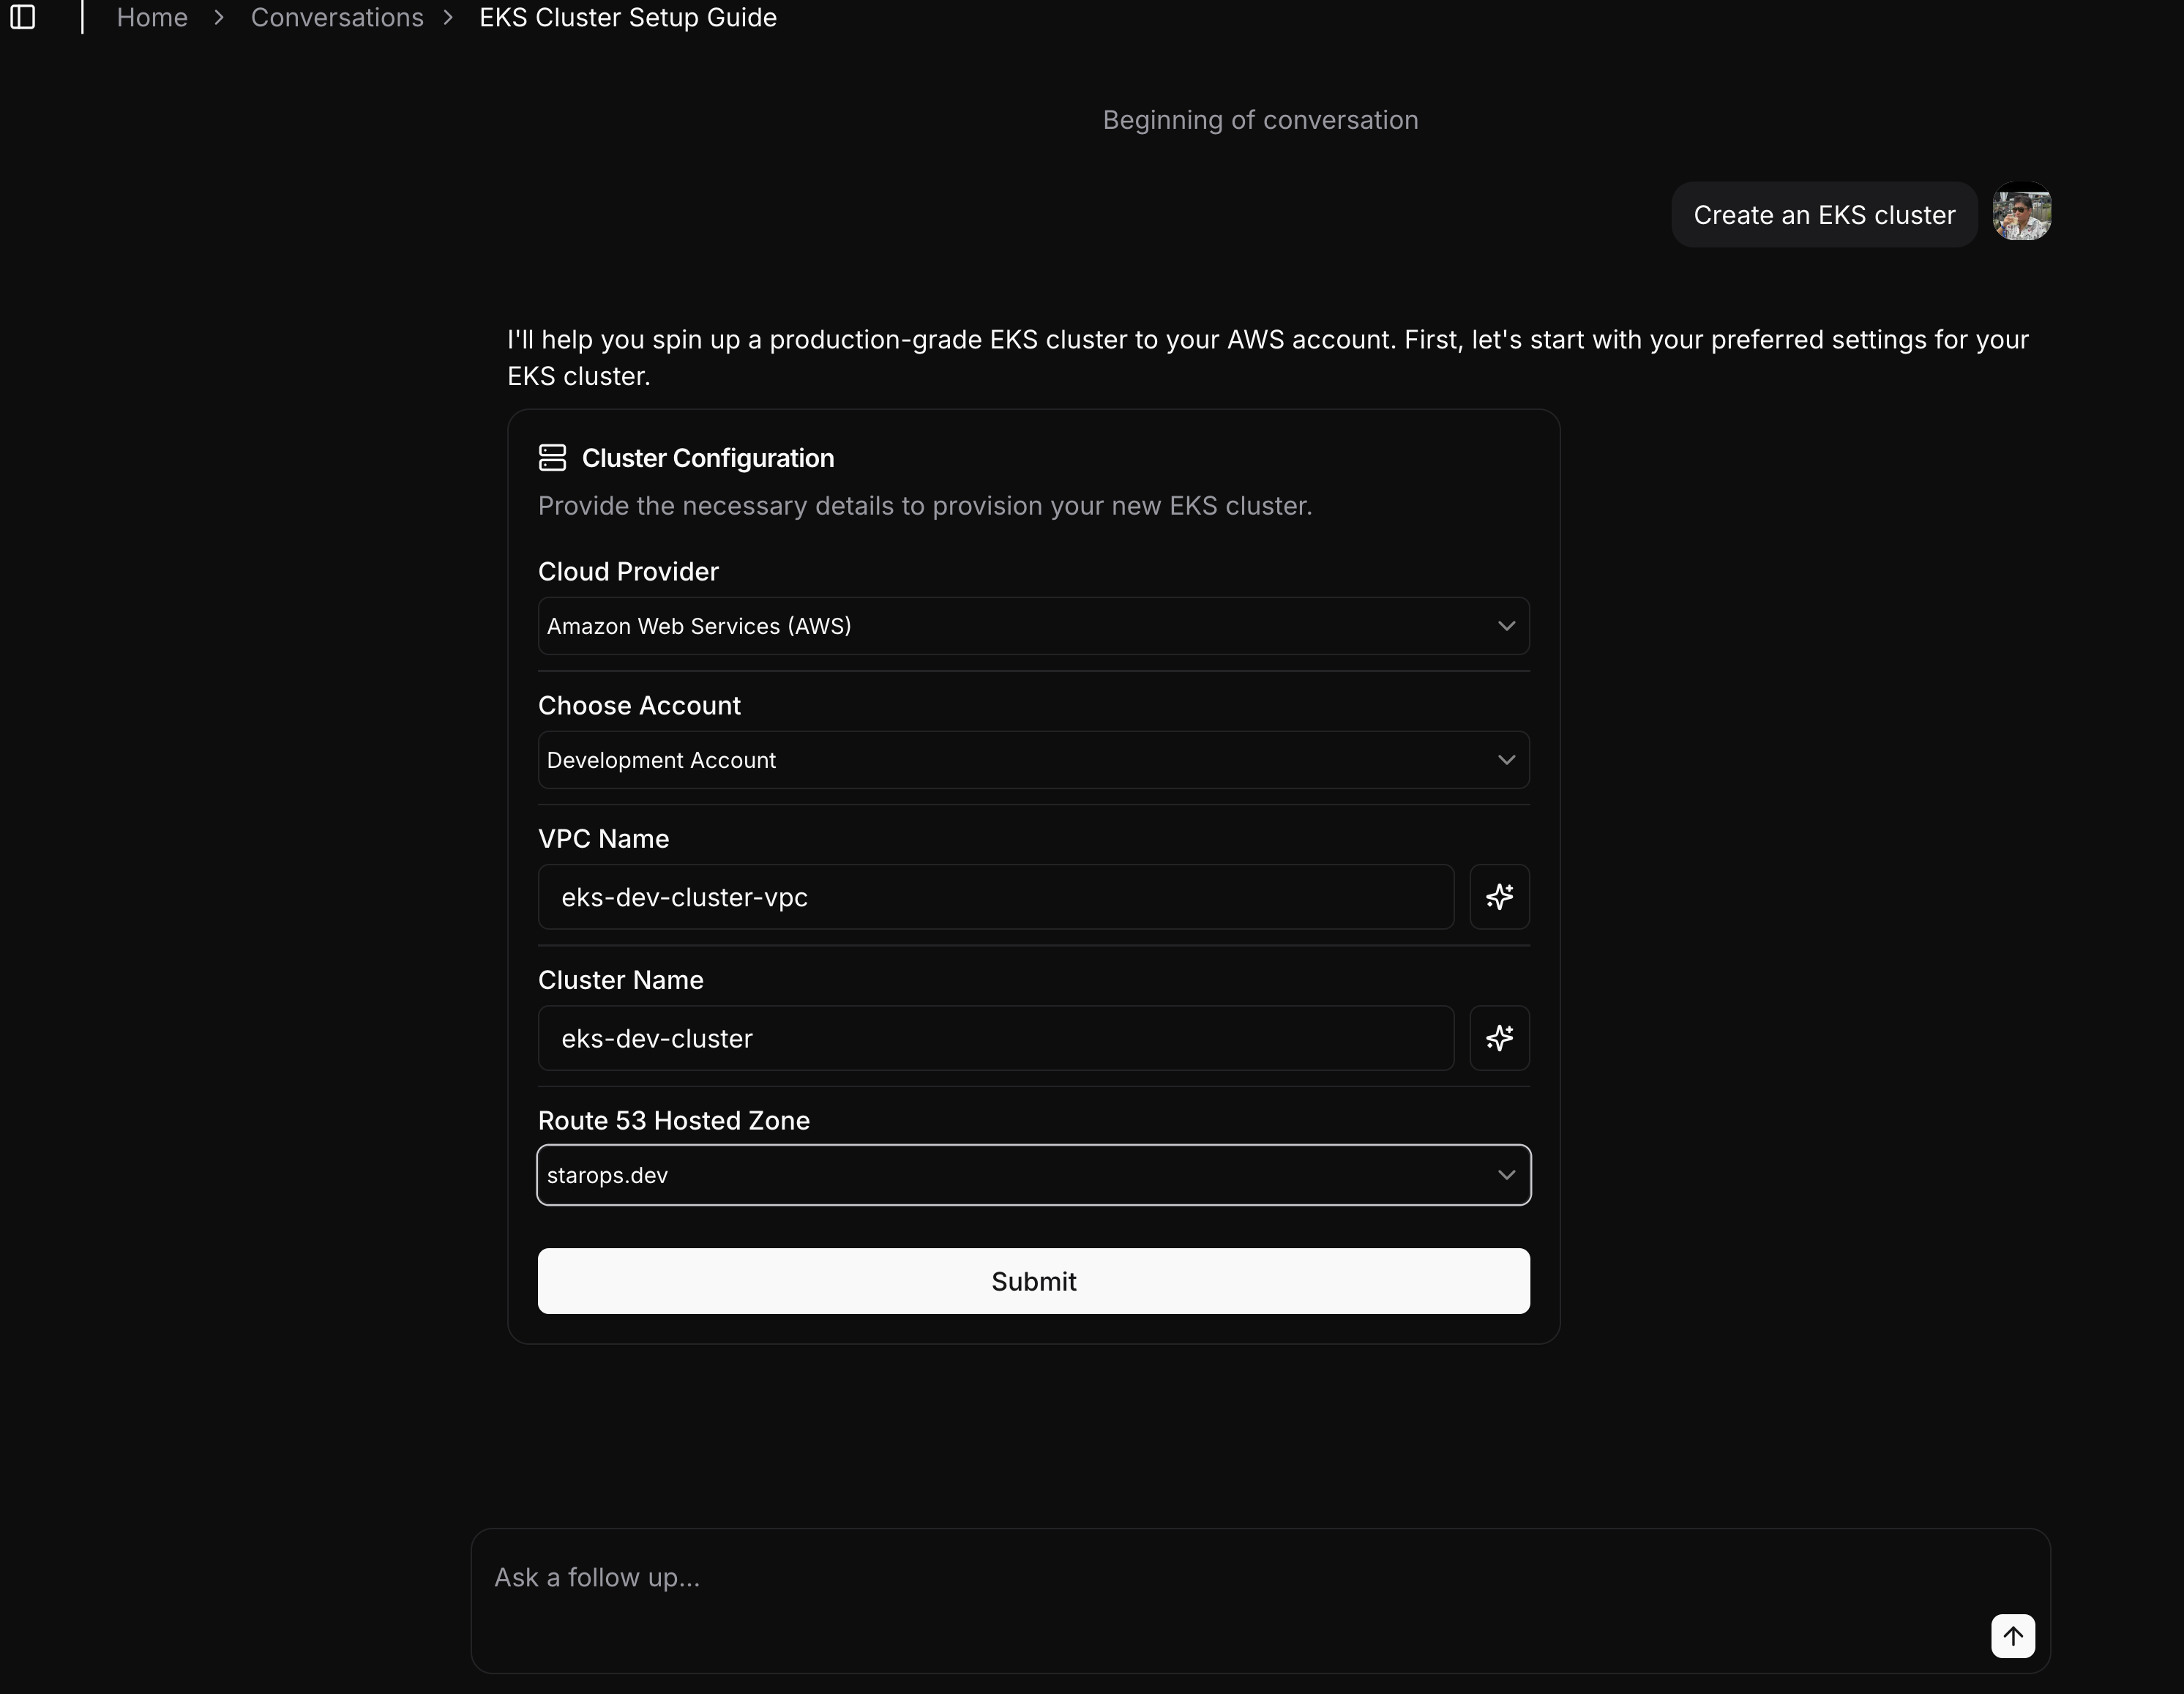
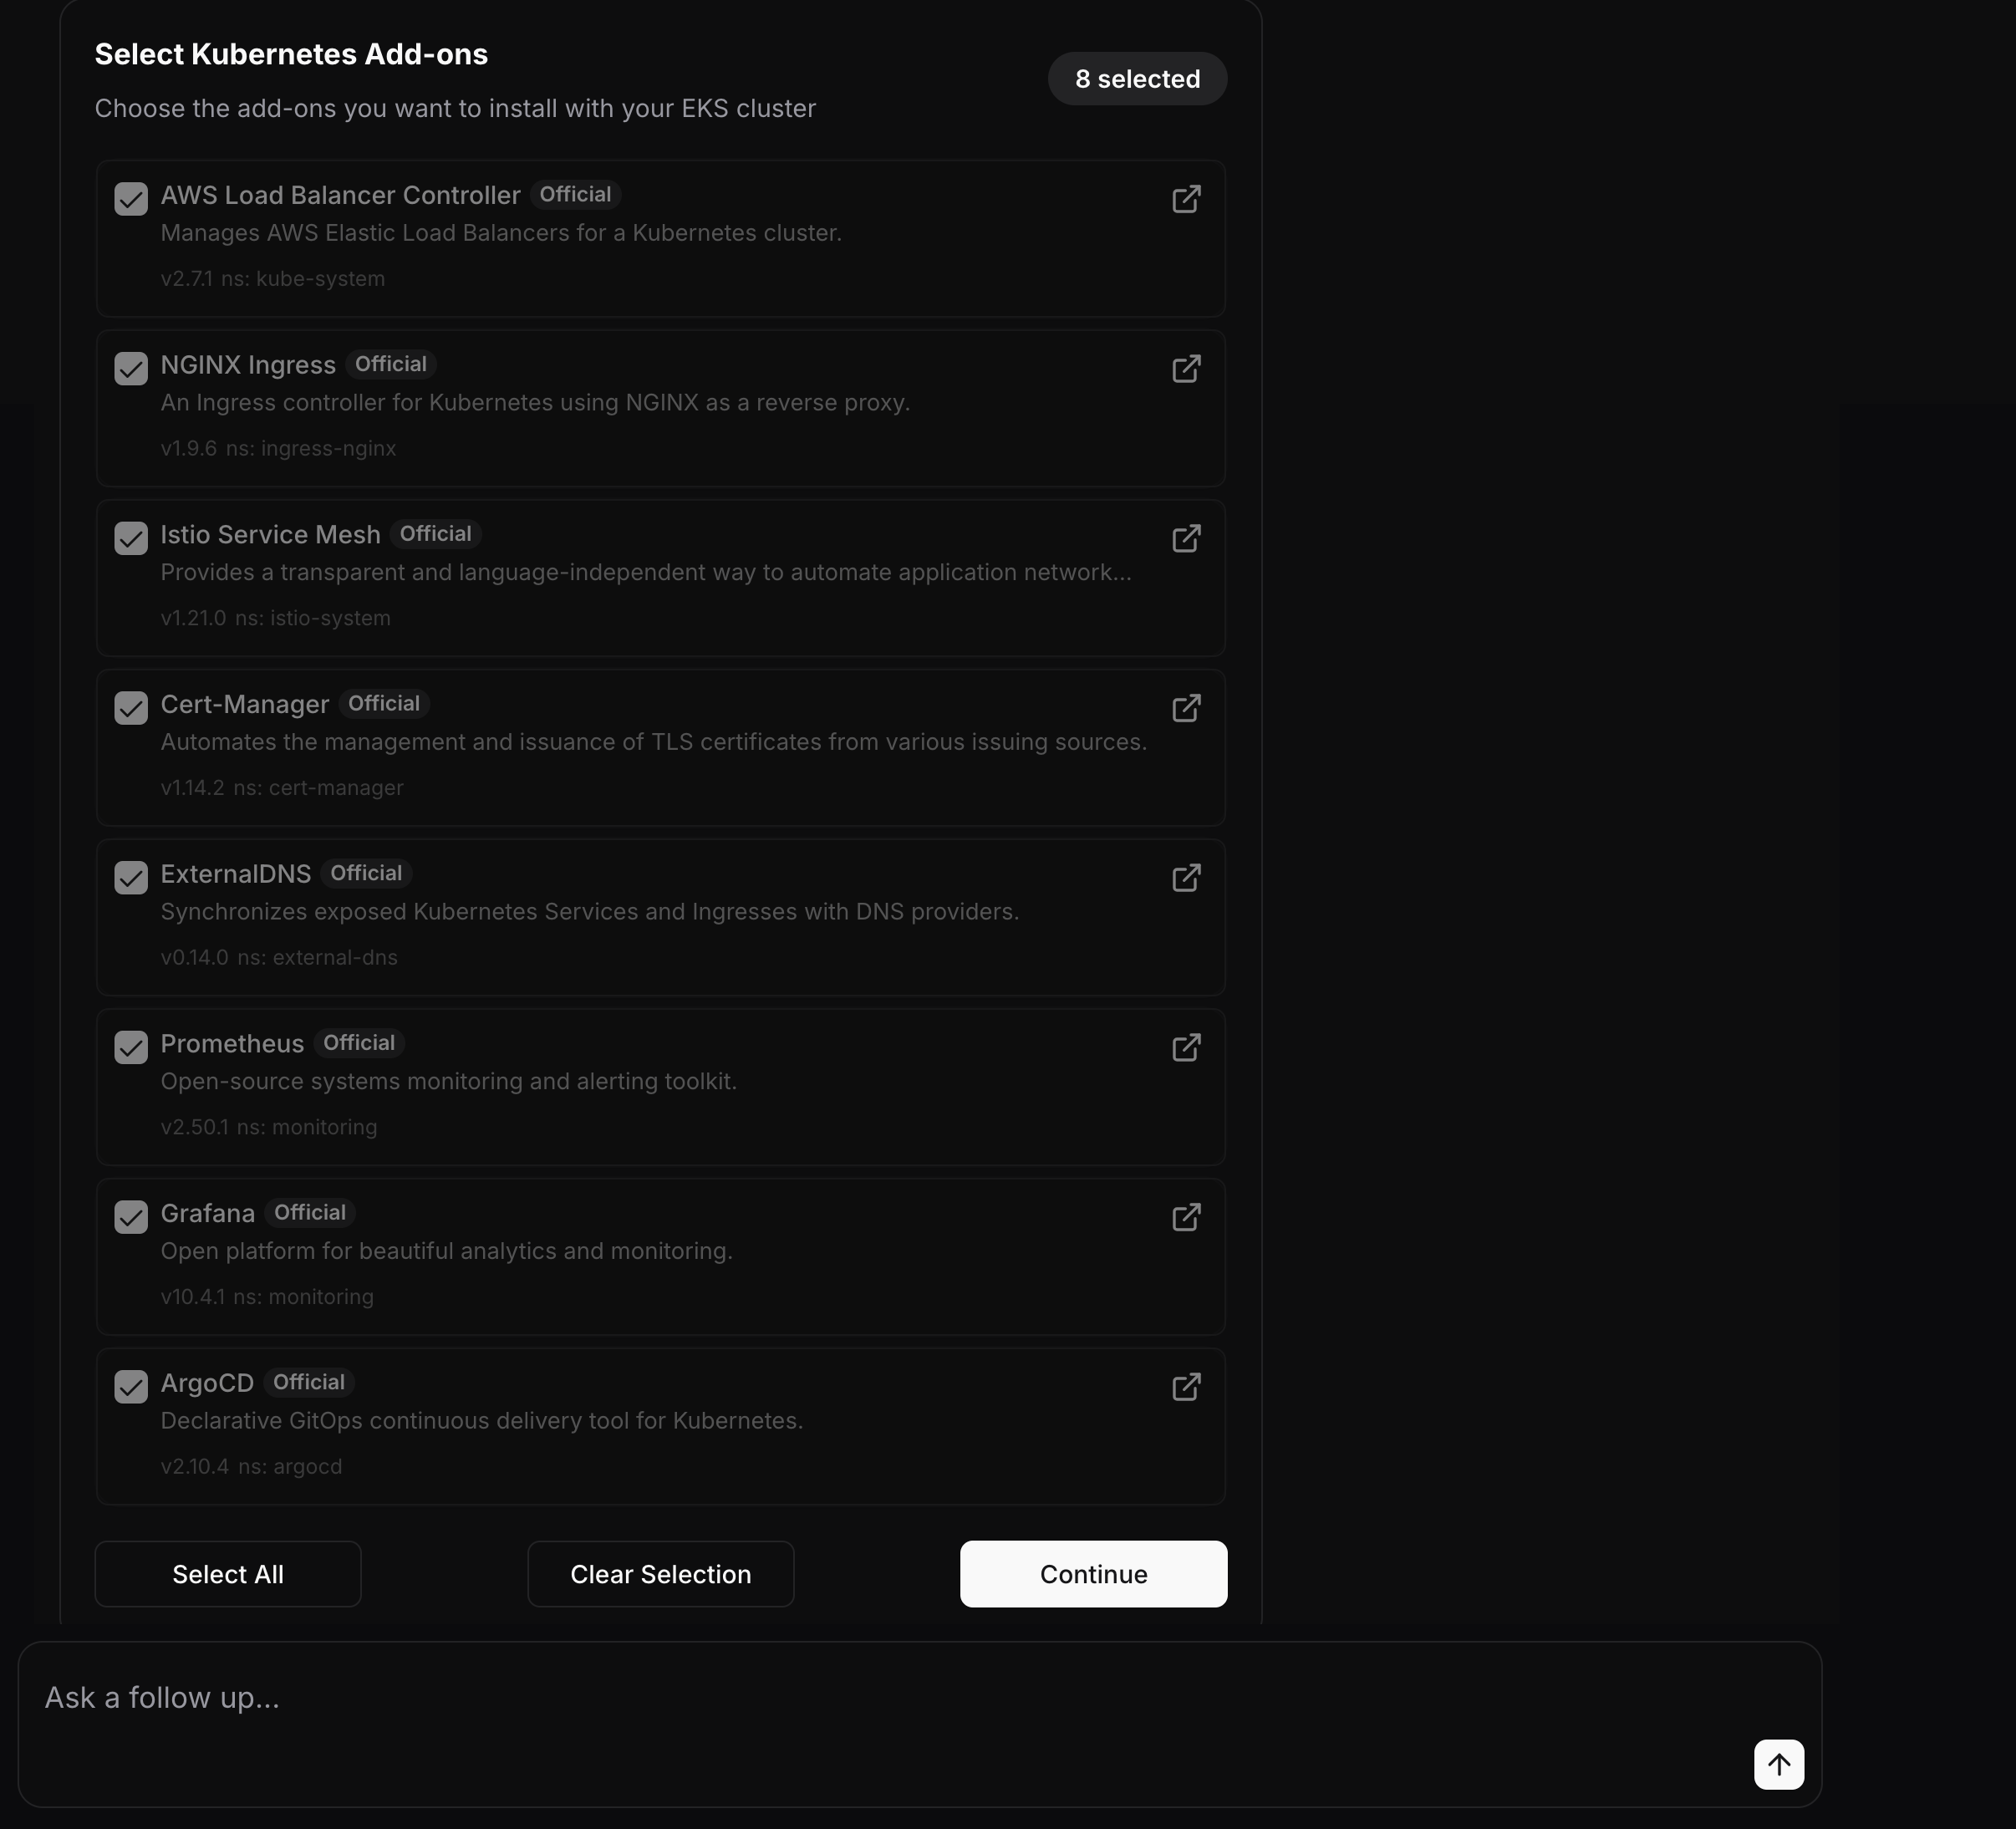
Available components include monitoring tools, ingress controllers, security scanners, and more. Each option comes with recommended configurations based on production best practices.
Step 3: Review and Approve
That's it! Review the proposed configuration - no need to worry about environment variables or complex settings. StarOps handles all the details for you.
Cluster Overview
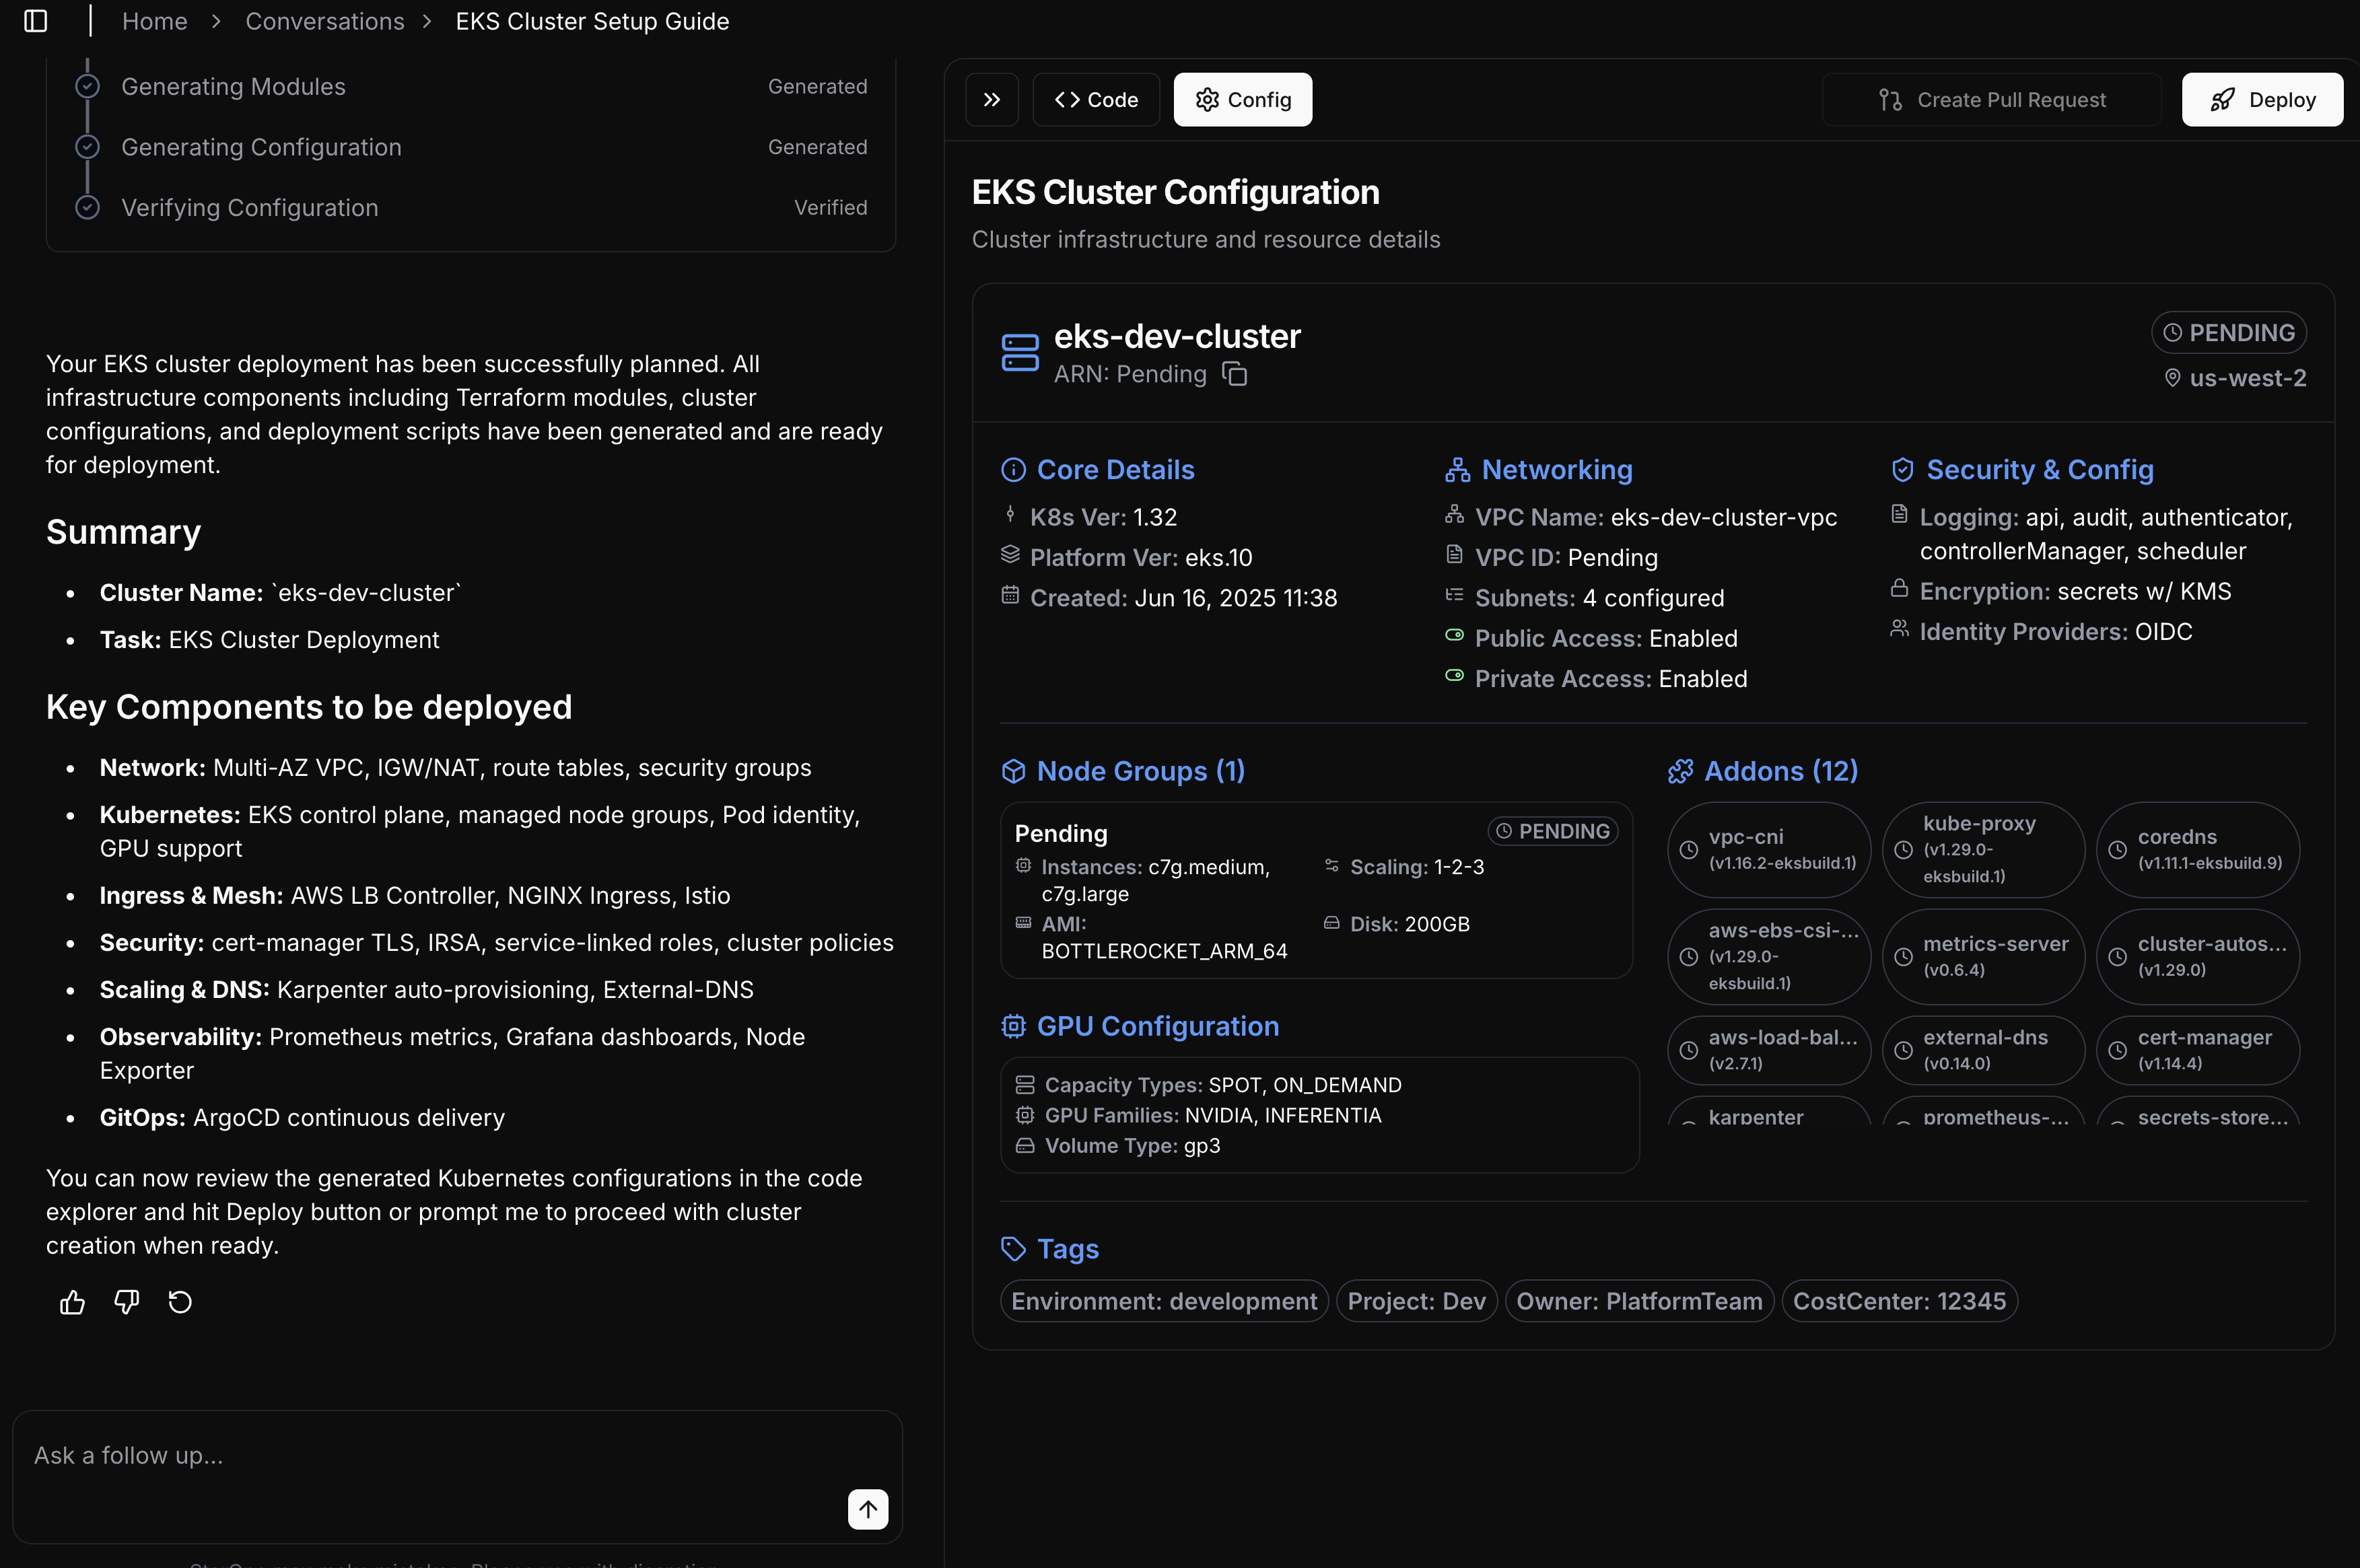
The cluster overview provides a comprehensive view of your infrastructure, including resource allocation, component status, and available assets. This helps you understand your cluster's configuration at a glance.
What You Get
- Production-ready EKS cluster with best practices
- Pre-configured monitoring and logging
- Security controls and compliance settings
- Automatic updates and maintenance
- 24/7 support and incident response
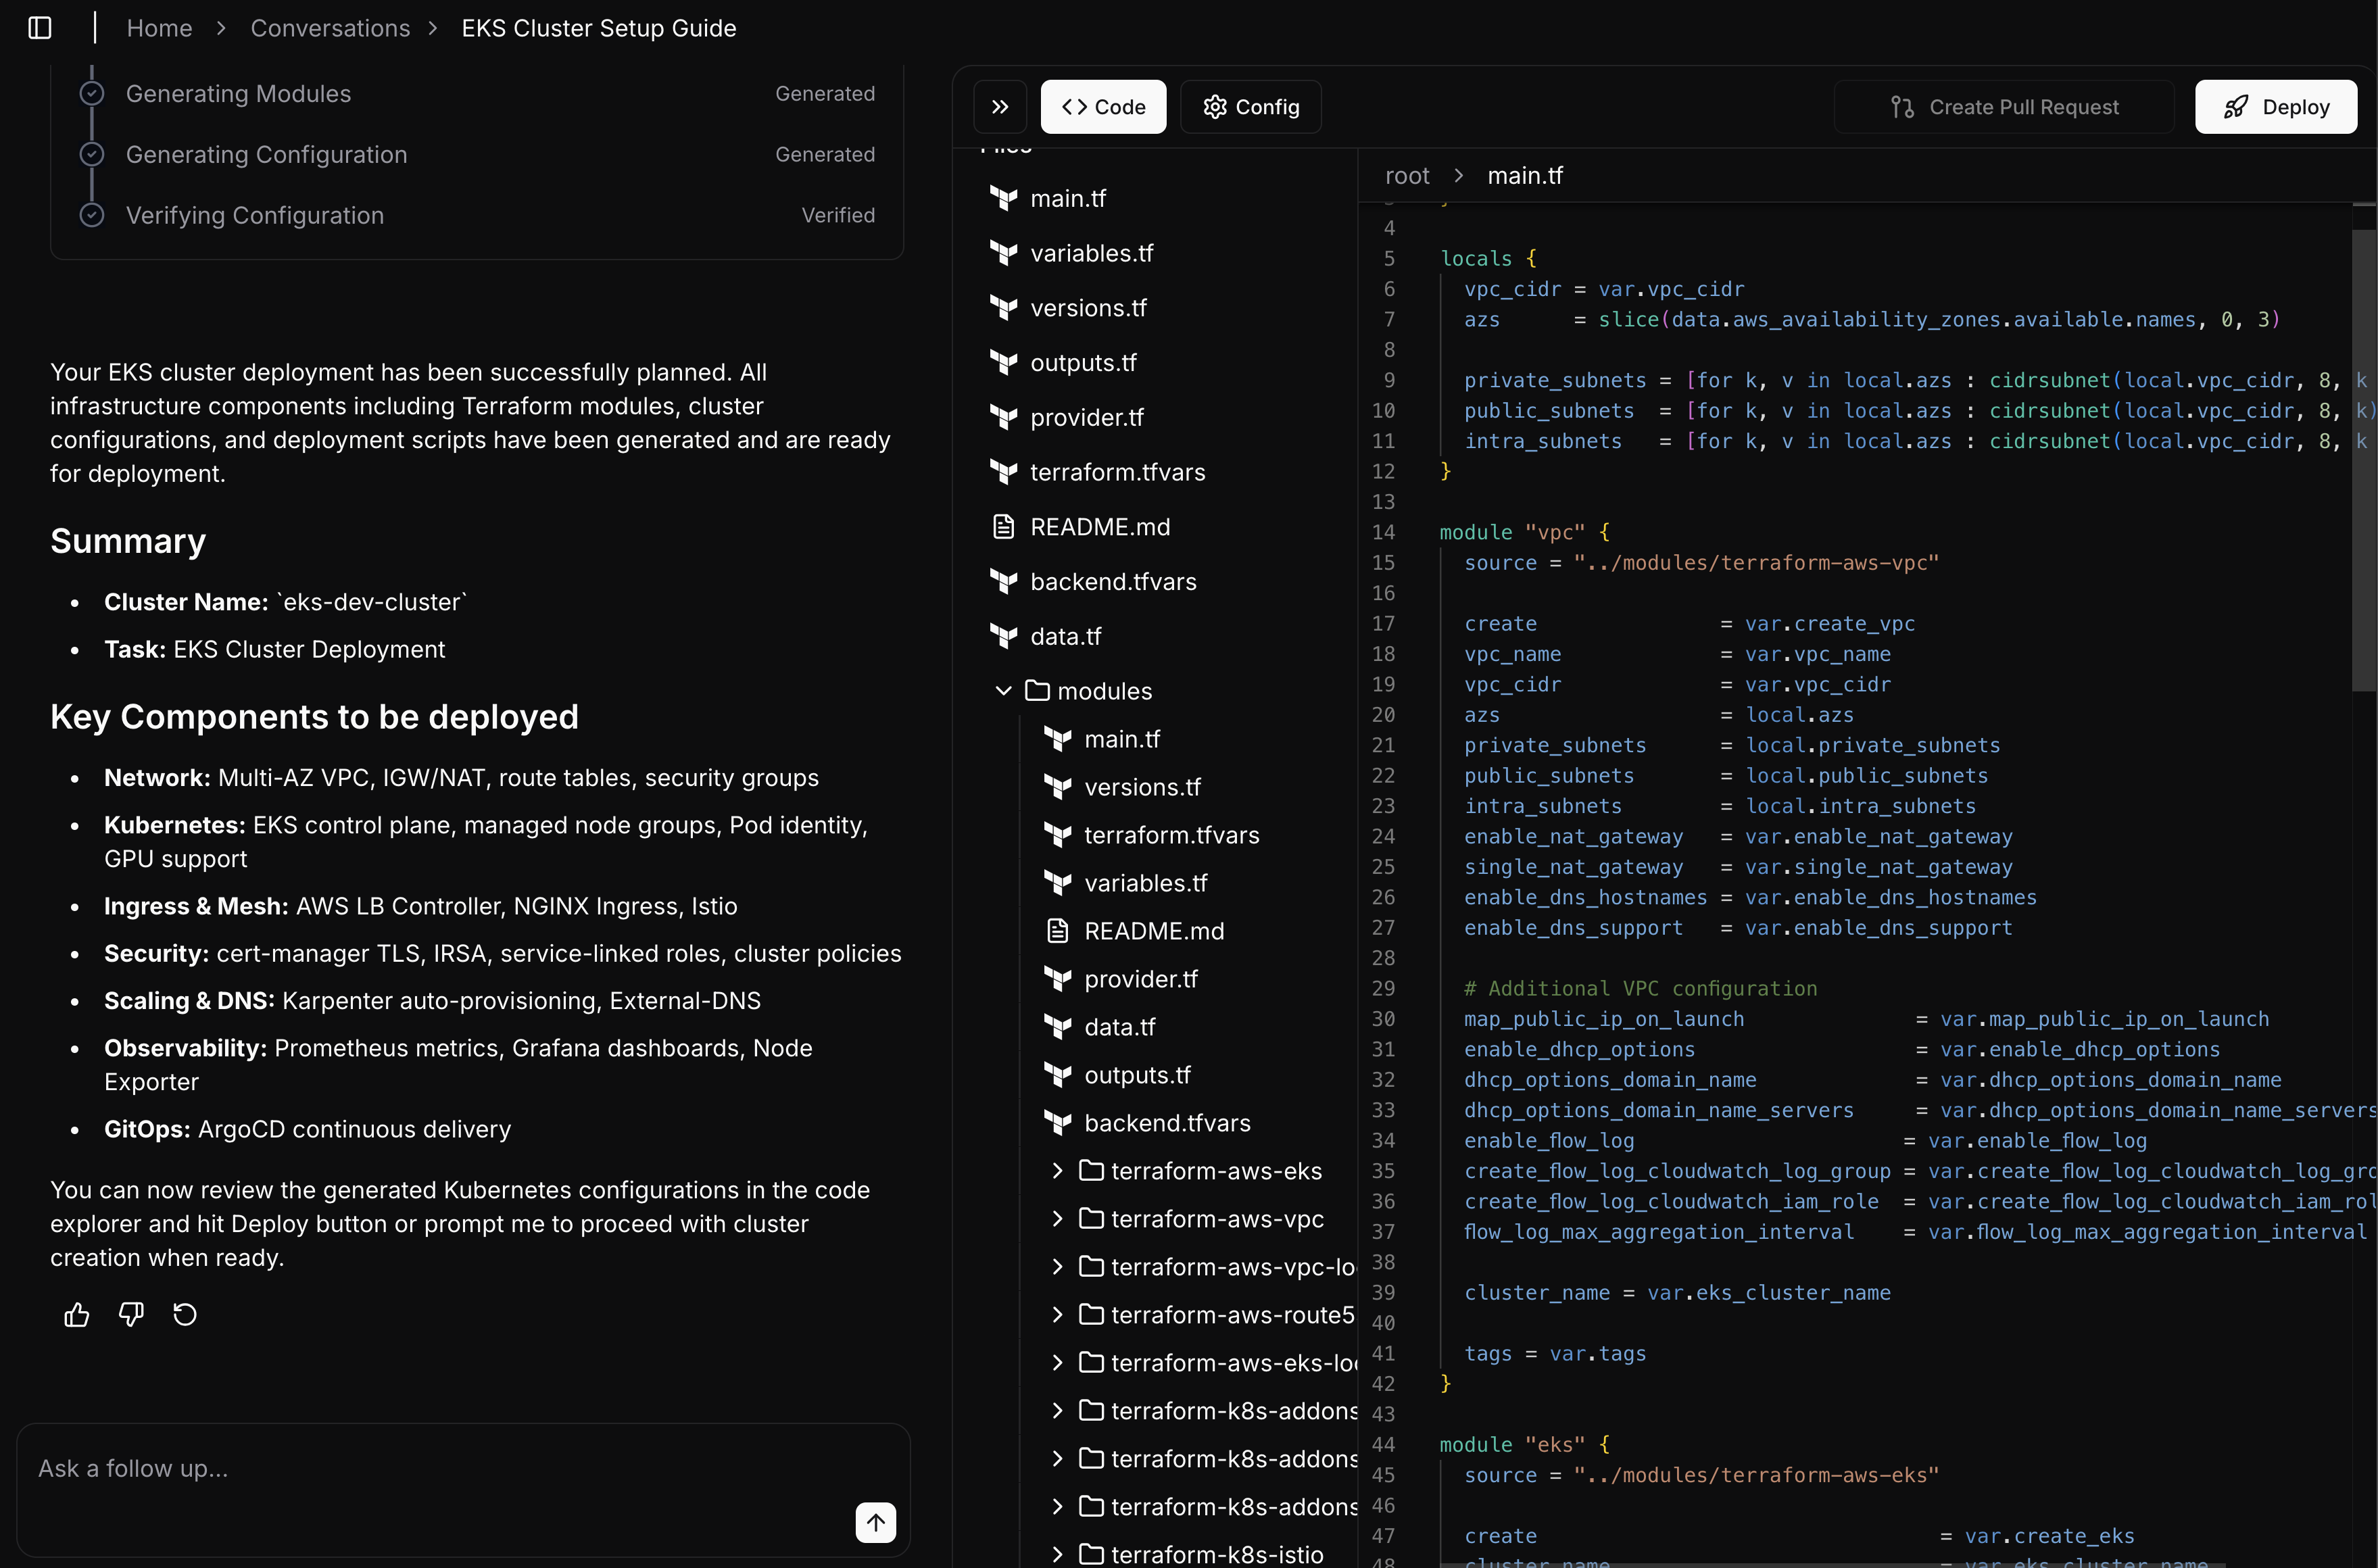
And that's really it! No step 4, no complex configuration, no need to learn Terraform or Kubernetes internals. StarOps delivers a production-grade cluster in about 10 minutes, with all the security and operational features you need built-in. Peruse the Terraform to see the difference between the general models' output vs what StarOps can do for you in your real environment.
Why StarOps?
- No infrastructure code to maintain
- Built-in security and compliance
- Automatic updates and patches
- Expert support when you need it
- Focus on your applications, not infrastructure